Installing Water Supply Lines
What You’ll Need
Difficulty: Novice
Time: About an hour for each install
Anyone who has had to crawl into a kitchen cabinet to change a water faucet and supply lines can attest to the fact that it is one of the harder things to do. Cramped for space and limited in your movements, you have to reach over your head in a confined area and attempt to loosen the supply lines, loosen the corroded nuts that hold in the fixture, and then ensure that nothing leaks when you’re done.
Installing Water Lines for Ice Makers
Many refrigerators have ice makers built into them. Running a line for this component is relatively easy for the average DIYer.
Step 1 – Drill an Access Hole for the Line
Check the basement directly underneath the refrigerator for an available cold water supply line and determine where the hole must be drilled for the water line. Drill the access hole. Do this carefully to ensure you do not drill into a baseboard or too far into the room—the hole must be under the refrigerator. If possible, drill the hole from the top down to ensure correct placement.
TIP: Doityourself’s plumbing consultant Wayne McCarthy suggests, “Pull the refrigerator out from the wall and, if it’s like mine, sweep up all the stuff behind it. Try tapping the floor to find the hollow sound between the floor joists for a good place to drill a hole. Measure off the wall about 1 inch and drill the hole with a 3/8-inch drill bit. Stick a piece of wire or something through the hole so you can find it easier when you go downstairs. Tape the end of the tubing and push enough tubing through the hole to make a couple of large loops. This extra pipe will make installation easier and also allow you to pull out your fridge for cleaning and recovering the cat’s toy.”
Step 2 – Run the Water Line
Temporarily run the copper tubing through the access hole. These lines are generally ¼-inch. Copper is the preferred tubing here. Cut the tubing to the appropriate length with a tubing cutter. Ream all burrs out of tubing (smooth out the inside).
Step 3 – Attach the Fittings
There are different styles of fittings that simply attach to the existing copper supply line. Most plumbers recommend that you don’t use the self-piercing style. Use a drilled saddle-tee valve, and always attempt to fasten it on a vertical water line. If you must attach it to a horizontal line, always put the saddle-tee valve on the top to avoid rust and corrosion settling into the tee valve, which will cause the line to eventually plug. Using an olive compression sleeve and compression nut, attach the water supply line to the saddle-tee valve. Install an olive compression sleeve and compression nut to the other end of the line, and attach this to the input of the refrigerator. Turn on the saddle-tee valve and check for leaks.
TIP: Wayne adds, “Most ice maker kits come with plastic tubing and it is good to use, especially where there is a water softener installed. Make sure to install an in-line filter for the ice maker to avoid problems with the refrigerator.”
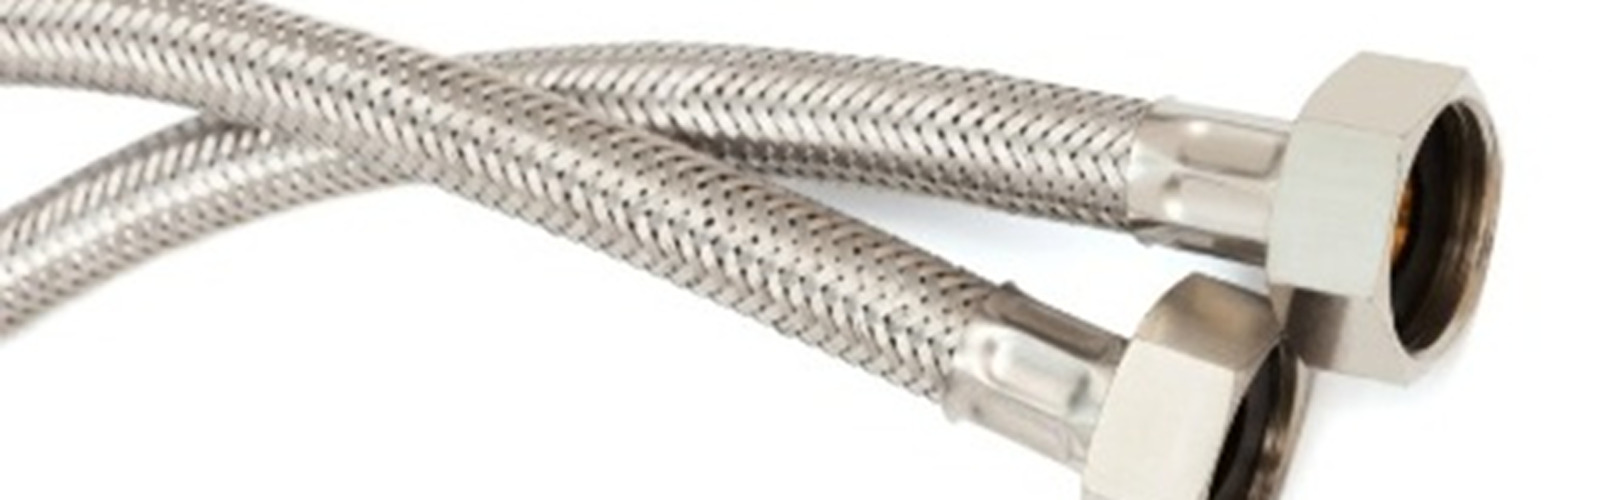
Installing Flexible Lines
Older homes have copper line running from the shutoff valve to the kitchen faucet. These lines will eventually corrode, generally at the fittings, which can cause damage to the cabinet and produce mold. A quick fix is to install the newer style of flexible lines, available at almost any hardware store. These lines can be moved up and out of the way, allowing more storage space under the sink.
Step 1 – Turn off the Water
Shut off the water valves to the faucets. You might see some leakage here because the valves are usually not turned off and on unless repairing or replacing the faucet. Be sure to put a drip pan under the valves.
Step 2 – Remove the Old Lines
Using the proper size open-end wrench, remove the supply line from the valve. There is a very handy tool available on the market that allows you to remove the lines from the faucet. Called a basin wrench, it has spring-loaded jaws that swivel 90 degrees, allowing the user to either loosen or tighten the faucet nuts. Newer faucets have plastic wing nuts that can usually be turned by hand.
Step 3 – Attach the New Lines
Attach the new flexible lines in the same way you removed the old ones. First to the faucet, and then to the water supply valve. Turn on the water, and check for leaks.
Installing a New Supply Line to a Toilet
The old supply line, generally chrome tubing, can corrode with age and begin to leak. A good replacement for this line is a stainless steel line. Coming in a variety of sizes and lengths, this offers the most flexibility and makes installation a snap.
Step 1 – Turn off the Water and Drain the Tank
Shut off the water supply at the valve. Then flush and drain the tank.
Step 2 – Remove the old Line
Put a drip pan in place to catch any water that leaks. Using an adjustable wrench, remove the old line from valve. Remove the line from tank. The basin wrench will be a big help here.
Step 3 – Install the New Line
Attach the new stainless steel line to the shutoff valve. Do the same on the tank end of line as well. Finally, turn on the water supply and check for leaks.
Replacing water supply lines is easy if you have the proper tools for the job. Follow these simple steps, and your next plumbing job will be much easier.

How to Install Toggle Bolts
What You’ll Need
Toggle bolts are particularly useful for hanging heavy objects on walls that do not have stud support. They consist of a threaded bolt and a pair of “wings,” which expand once the bolt is installed. Typically, a bracket or a hook, where the object is to be hung, runs through the bolt.
These bolts come in a variety of sizes, and they can be used for both horizontal and vertical installations. Moreover, they’re inexpensive and easy to install. Just follow the steps described in the guide below to begin.
Step 1 – Select the Right Toggle Bolts
When you are purchasing the toggle bolts, make sure that they will be strong enough to support the hanging furniture. Check the rating of the toggle bolts to see if they will suit your purposes. If the bolts in the local hardware store are not rated, ask the salesperson for advice.
Estimating the Correct Bolt Size
Usually, the larger the toggle bolt, the greater weight it will be able to carry, but you should check a bolt’s weight limit to be sure. Also pay attention to the length of the bolt. You should buy bolts that are longer than the cumulative thickness of your wall, the toggle, and the bracket or hook you will be using.
Step 2 – Mark and Drill Toggle-Bolt Holes
With a pencil, mark the places on the wall where you are about to bore holes for the toggle bolts. Used a level for accuracy. To prevent the wall from chipping away while you are working, you may cover the markings with a semi-transparent masking tape.
Then, bore the holes with a power drill. Ensure the bit is rotating clockwise. Once you are done drilling, remove the masking tape.
Step 3 – Install the Toggle Bolts
Insert the bracket in the bolt and thread the toggle onto its end. Fold the toggle back, and insert it through the wall hole until you feel the wings have opened on the other side of the wall. Pull the bolt back until the wings catch the wall. They should not be twirling while you are fixing the bolt.
Screwing the Bolt in and Repeating
Then, screw the bolt in the wall with a screwdriver. Before steadying it completely, ensure the bracket is perpendicular to the floor. Repeat the procedure for the other toggle bolts.
If your were successful with your toggle-bolt installation, try installing one of these bolts in the ceiling to hang other objects.
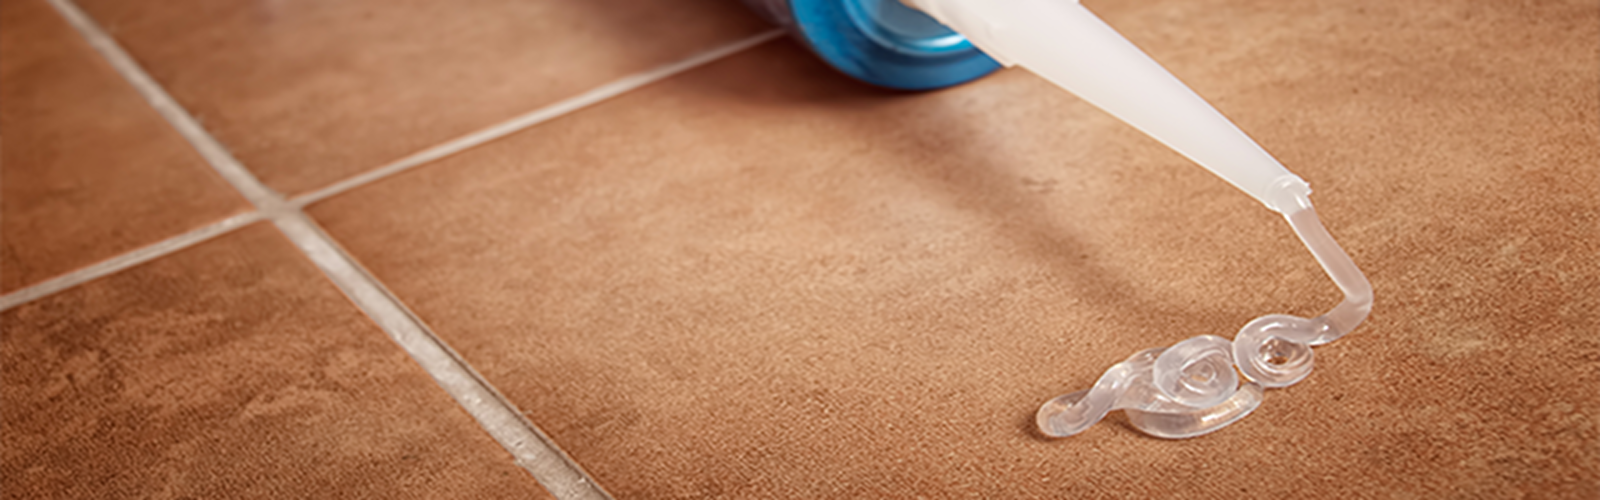
How to Remove and Replace Silicone Caulk
What You’ll Need
Whether you’re replacing the silicone caulk in your bathroom as a result of remodeling or of mold and mildew growth, it’s essential that you completely remove it and clean the surface. Residual amounts of silicone caulk will prevent the fresh bead from sealing correctly. Take your time and work thoroughly with the instructions below for the best results.
Step 1 – Soften Caulk
Clean the area thoroughly with soap and water to ensure that there is no dirt or soap barrier preventing the chemicals from working on the caulk. This will also make it easier for you to see what you are doing once you begin removal. Apply caulk remover to what you intend to remove, following the manufacturer’s instructions on how long to leave it before moving on to the next step.
Step 2 – Cut Away Caulk
Once the chemical has had time to soften the caulk, use the utility knife (a fresh blade is recommended) to cut through it. In some cases this cutting will cause the sealant to fall out of the joint easily. However, if it is very thick or there is more than one layer, you may need to use pliers to pull it out.
Step 3 – Remove Residual Caulk
Any chunks that remain can be scraped out using a caulking removal tool or putty knife. A plastic putty knife can be very effective and is unlikely to cause any scratching to bathroom fixtures. If you are using a metal tool, take your time and apply a gentle pressure to remove the caulking in thin layers. This method reduces the risk that you will lose control of the tool. Also, it can be helpful to apply pressure in only one direction rather than sawing at the caulk. If necessary, you can use water as a lubricant.
Step 4 – Clean
In order to obtain the best seal on your new caulking job, you need to thoroughly clean the joint. Use an old toothbrush to apply a mixture of one part bleach to three parts water to the area and scrub it thoroughly. This will ensure that there is no dirt or mildew left behind.
If small amounts of caulk are still present, you can use rubbing alcohol or acetone on a rag to remove them. Make sure that the surfaces are completely dry before you move on to the next step.
Step 5 – Recaulk
When the area is completely clear of the old silicone, you can apply the new product. Use caulk with mildew protection or fungicide to prevent unsightly buildup and maintain lasting good condition. Frequent cleaning to prevent a buildup of soap residue is also recommended to ensure that the product lasts for the longest possible time. When applying the new caulk, wipe off any misplaced material quickly before it begins to cure. Otherwise your finished product can look sloppy.
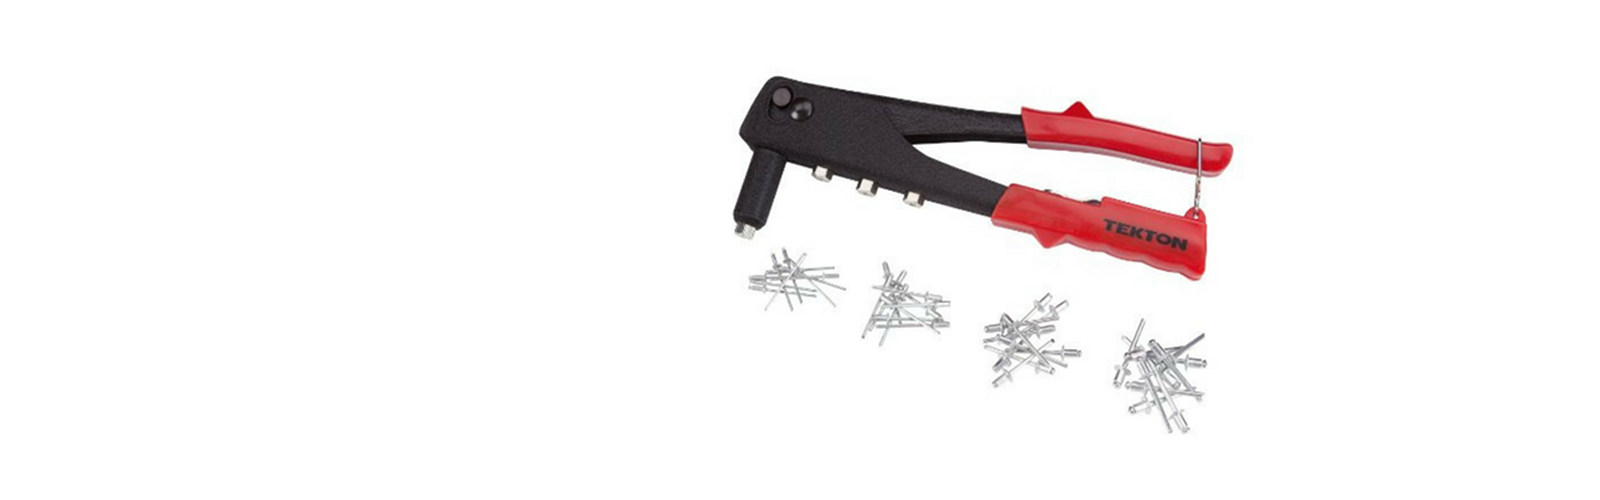
How To Remove A Pop Rivet
Pop rivets are one of the most simple fasteners to use when fixing two pieces of metal together. However, it’s easy to make mistakes even if you’re experienced with them, so learning how you can remove them without damage to the metal is a useful endeavor. Removing the pop rivets is actually very easy; you will simply need a drill and drill bit capable of drilling through metal. Only once the rivet has been removed can you apply a new pop rivet properly to secure the pieces.
Step 1 – Select Your Drill Bit
The first thing you should do is spend time carefully choosing the right drill bit for your project. The drill bit needs to be slightly bigger than the stem of the rivet but smaller than the head. The purpose of drilling through the rivet isn’t to drill right though; it’s simply to take the head off so that the fastening can be removed. The drill bit you choose should be able to cut this head.
Step 2 – Prepare
Put the drill bit into the drill and tighten the chuck up. Make sure that you support your metal work properly so that you can safely and easily work on the rivet in question.
Some rivets have a center indent while others have a completely smooth head. If yours are smooth, hammer the tip of a small punch into it to create an indent for guide.
Step 3 – Drill
Place the tip of the bit in the center of the rivet head and start drilling, but keep the speed low at this point. It can be difficult not to skid everywhere when drilling rivets which is why you will need start slowly. Once the head comes away from the body of the rivet stop immediately. Do this quickly because carrying on could cause damage.
Step 4 – Remove the Rest of the Rivet
If the rivet hasn’t come out already due to the vibrations, then you can simply remove the rest of the rivet by using the center punch and hammer. Put the punch onto the rivet stem and then give it a hit; this should make the rest of the rivet fall out. If you have done this carefully and properly then the metal around the rivet should not be damaged at all.
Step 5 – Repeat on Other Rivets
Repeat the process on other rivets until you have removed all of them. Your two pieces of metal can be separated at this point and readjusted if needed. You can then choose another method of attaching them or decide to rivet them again.
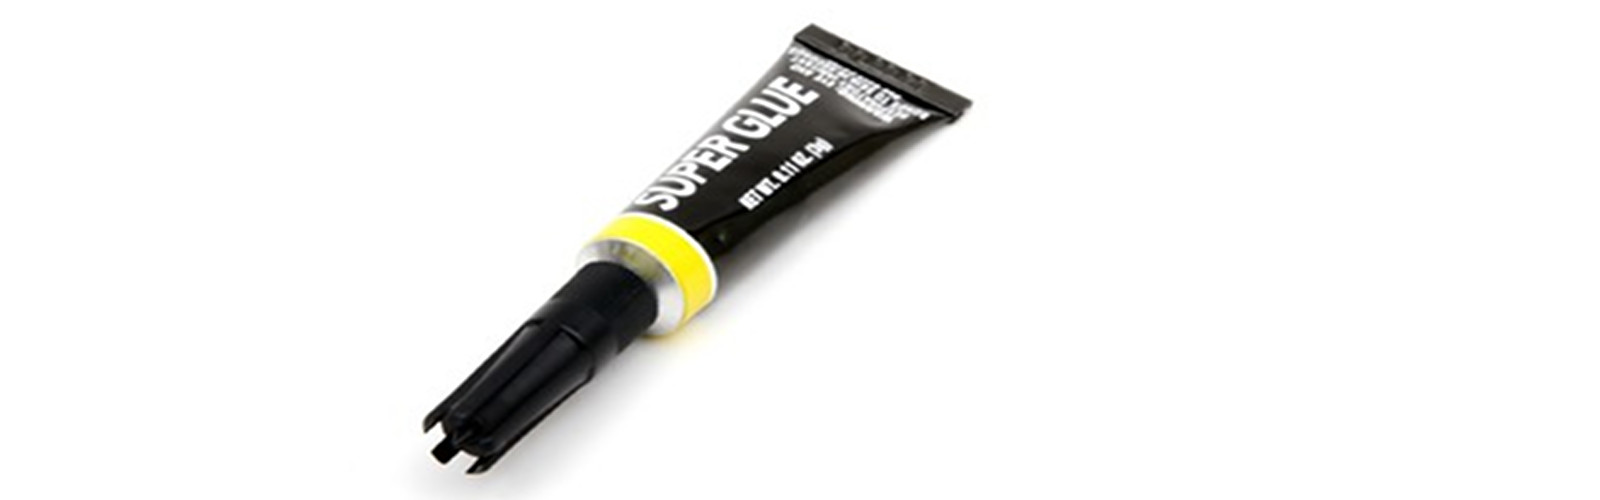
How to Remove Super Glue from Laminate Surfaces
Super glue can be a life saver, but when you are using it, you want to be careful not to drop or spill any because it can be very difficult to remove from any surface. The properties of this glue allow it to adhere to the smallest of particles in nearly every kind of material. If you get some on a laminate surface, however, you can remove it with only a few tools and these instructions.
Step 1 – Apply Acetone to the Glue
The most common thing that can reverse the effects of super glue is acetone. It can be found in nail polish remover and some household cleaners. Be sure to read the ingredients on the bottle of whatever you’re using so you know that it contains acetone because many nail polish removers do not.
The first thing that you will want to do is loosen the super glue’s hold on the counter. Apply acetone to a rag and let it soak on the glue for a few minutes. Focus on the edges because this is what you will be using to get the glob of glue to come loose. While acetone has no odor, other ingredients in nail polish remover can be harmful if breathed for an extended period of time. Be sure to keep your work area properly ventilated.
Step 2 – Get a Flat Blade Under the Glue Edge
In time, you will begin to notice that the edges of the super glue are getting soft. You should get it to a point where the blade can slip between the glue and the counter, creating leverage more so than cutting into the dried adhesive. Then, take your flat-edged blade and work the loosened glue away from the laminate. Keep it as even with the surface as possible to avoid creating gouges. If you are not finding an edge to get the blade under, apply more acetone.
The best blade for this task will be a flat razor blade with a handle that exposes the entire blade surface. This will allow better stability when using the tool and allow you to move it at the correct angle.
Step 3 – Remove any Leftover Stains
The super glue will eventually just pop off, but when it does, it may leave a stain on your counter top from where the glue molecules have set into the surface. This comes from the simplicity of a super glue bonding agent; the glue sticks to the surface, and then in turn sticks to itself to form a stronger bond.
To get rid of it, apply more acetone to your rag, and then vigorously scrub the affected area until it dissipates. The acetone should eat the remaining glue remnants without a problem, leaving your counter the way it was before the tragic spill.
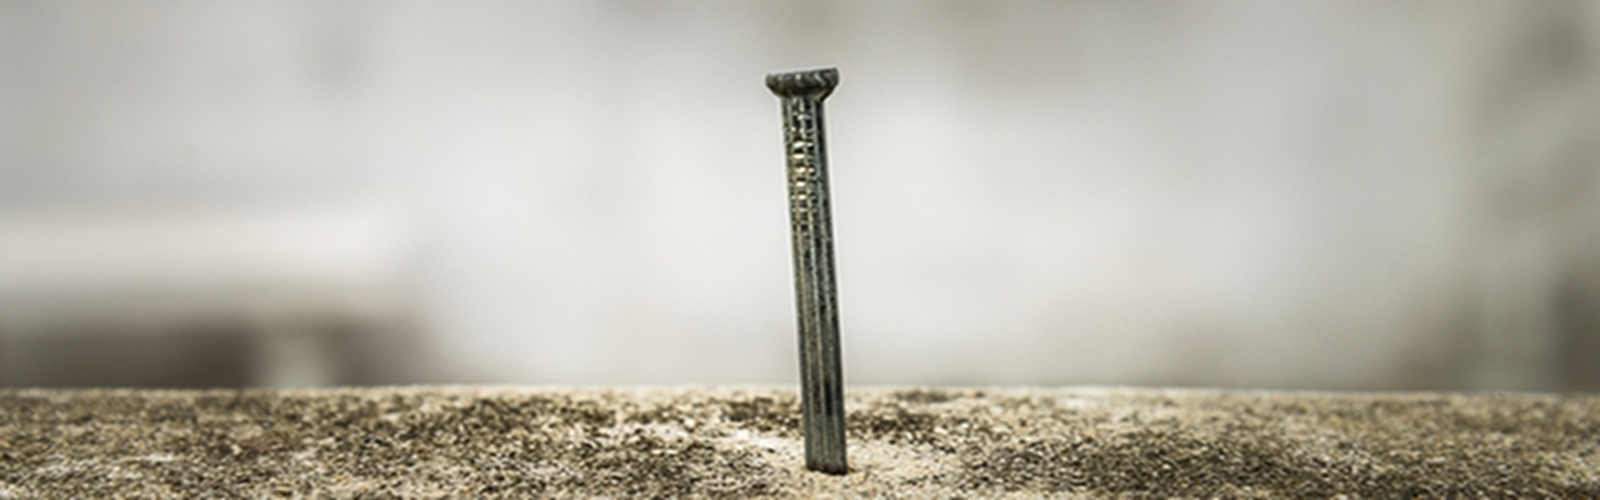
Nail Into Concrete Tips
It is a simple process to knock a nail into wood, but to nail concrete is a completely different matter. Concrete is a hard-set substance which is firm and durable. It will not take invasion easily, and hammering into concrete requires the right tools and process.
Tip 1 – The Right Nails
Use the correct nails when you intend on hammering them into concrete. Proper masonry nails (or concrete nail) are specifically designed to withstand the pressure of being hammered into a hard-set surface.
Tip 2 – The Correct Hammer
Use at least a two pound hammer. A heavy hammer will give the right amount of power and leverage behind it and create the exact force needed for the nail to penetrate the concrete.
Tip 3 – Powered Nail Gun
High air-pressured or electric nail guns will definitely get the job done. Before beginning, mark the area where the nail will be set and use the powered gun to force the nail into the concrete.
Tip 4 – Shanks
Choose the proper nails for your job. There are different lengths of concrete nail shank, and you should purchase the right type. The shanks have spiral patterns ingrained in them that help the nails penetrate and stay in the concrete.
Now you are all set to nail you next DIY project. That concrete will be no match for your new skills!
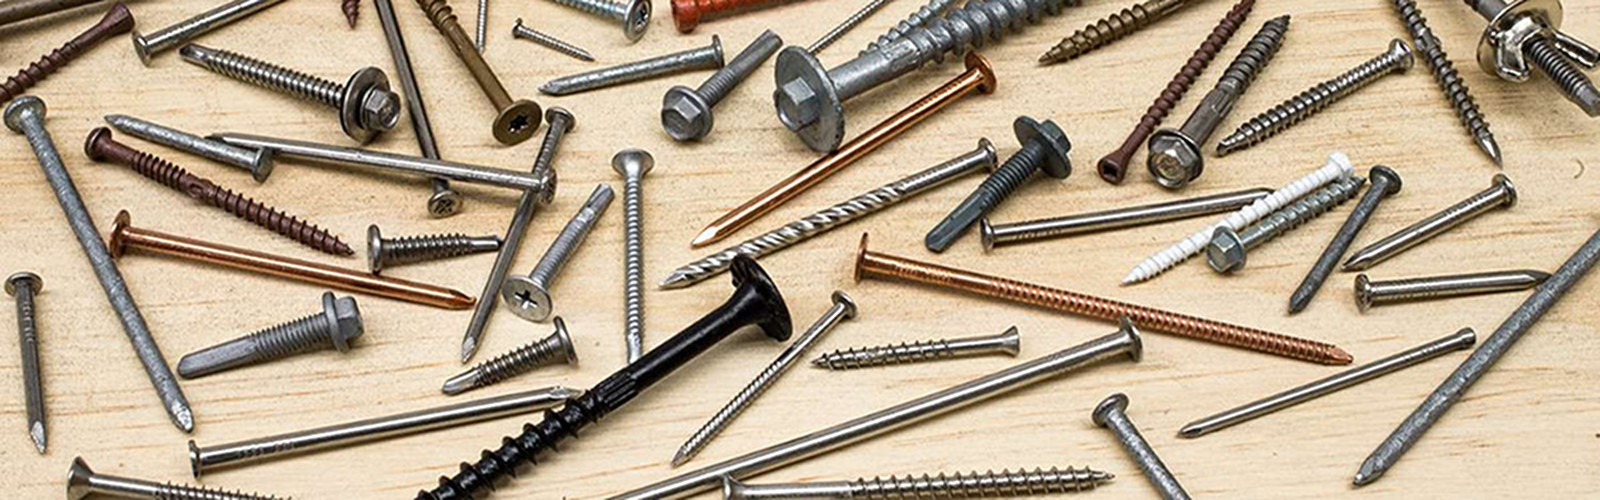
Nail and Screw Sizing
What You’ll Need
The following nail and screw fact sheet will help you pick what size screw and nail to use for fastening jobs. Although there is seemingly nothing complicated about a nail or a screw, many are misused due to improper sizing. Therefore, determining the right nail and screw sizes is essential for the success of your project.
Selecting the Proper Nail and Using it Correctly
Although there are many different types of nails and brads, four types will handle most fastening jobs.
The common nail is most widely used. It has a flat head and is used where the appearance of the nail head is not objectionable. The length of a common nail is identified by its “penny” size. In the early days of nail manufacturing, this term designated the weight of nails per hundred. Today it designates only the length and size of the nail. The designation 2d, 3d, 4d, etc., identifies a 2-penny, 3-penny, 4-penny nail, etc.
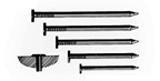
The casing nail is used primarily on cabinet work or interior trim. Casing nails are slightly heavier than finish nails. The heads of casing nails are normally countersunk and covered with putty or wood filler to hide them from view.
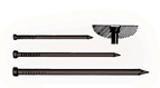
Finishing nails have rounded heads that can be driven flush with the surface of the wood. Although they are often countersunk like casing nails, they can be used without countersinking.

Common brads are designated by length only. Brads are recommended for light assembly work where the head should be concealed. They are thinner, shorter, and smaller than finish nails.

Use the nail selection chart below for selecting the proper nail or brad for various thicknesses of wood. The chart shows the recommended type and size of nail or brad for woods of various thicknesses. You may want to make some variations from the chart, but it can be a practical guide in nail selection.
Nails or Adhesives
When it comes to fastening things together, people have been inventing creative ways for centuries. Years ago, they used leaves braided into rope to tie things together. Then, someone came up with the idea to use tapered wooden pegs. Wooden pegs evolved into metal nails (as well as screws, bolts, and staples) that held well, but required making holes in the pieces being fastened together.
Nowadays, modern chemistry has come up with glues and adhesives that can hold as well as nails, eliminating the need to make holes in things. So, can adhesives actually replace nails or is this really a case of different solutions for different problems?
A Quick Primer on Nails
- Nails are one of the most common type of metal fasteners used in construction today. They’re available in different shapes (common nails, box nails, casing nails, brads, and finishing nails).
- Nails are also available in numerous sizes, measured in a unit known as a Penny (abbreviated with by a lower case letter d). The higher the number, the longer the nail — so a 6-penny (6d) is 2 inches long while a 10-penny nail (10d) is 3 inches.
- There are also a wide range of specialized nails. For example some have threading (like drywall or spiral nails) to help them hold more solidly. Others have special coatings of material like zinc or resins to prevent them rusting, and some can be a combination of both (like galvanized spiral nails used for outdoor work).
Nails are widely used because they’re readily available and inexpensive, but there are some issues with nails.
- Nails hold much better when they are driven across the grain of a piece of wood rather than along or with the grain, so nails driven into end grain can be pulled out relatively easily.
- A nail is actually a form of a wedge. That means when it’s driven into a piece of wood it can actually split the wood in two, particularly if it’s driven too close to the edge or too many nails are driven along the same grain line.
- Nails work best when used to hold pieces of wood together. If you need to fasten anything other than wood, nails really aren’t your best choice. They don’t work well with bricks or metal.
What About Adhesives?
Glues have been around probably as long as wooden pegs were used as nails, but, like anything else, natural glues have there downfalls.
- They don’t work well in the cold.
- Some are water soluble so they won’t last if they’re being used outside where they’re exposed to the elements.
- They often take a long time to set up so after gluing pieces together. This means you have to somehow hold the pieces in contact until the glue has dried.
- Many of them aren’t really strong enough to hold pieces together when used by themselves, so you will likely need to combine them with nails or brads.
However, modern plastic-based glues and mastics (resin, asphalt, or rubber base) have significant advantages over those natural glues. Contractors and homeowners alike are finding that modern adhesives are invaluable in many construction projects and by using the correct adhesive for the job, you can prevent a lot of maintenance down the road.
Today there aren’t many applications where an adhesive isn’t at least an option to do the job and the choice between glue and nails come down to personal preference.
- You can get adhesives that are resistant to rain or snow and some that are even designed to work with frozen or wet wood, so cold and moisture aren’t an issue.
- Some new adhesives set up in seconds, so figuring out how to keeping pieces in contact with each other while the glue sets up isn’t a problem.
In fact, in some applications adhesives provide functionality that nails just can’t.
- Glues can bond building materials (firring strips) or insulation directly to brick or concrete walls.
- You can also put up drywall or paneling with glue, eliminating the need to fill nail holes and ensuring you never need to worry about nail pops.
- Mastics can be used to join plywood panels to floor joists, helping eliminate squeaky floors.
- There are also some applications where nails just aren’t suitable. For example, jobs like mounting a mirror onto a wall, or installing a bathtub surround are perfect for adhesives.
Choosing the Correct Adhesive
The main challenge is choosing the correct adhesive. Fortunately, most glue manufacturers do a good job of labeling the materials each of their adhesives is designed to work with. So when it comes to choosing an adhesive, take the time to actually read the labels and get the right adhesive for your project.
There’s no doubt modern adhesives can match the holding power of nails, have their own advantages, and in certain applications are the only way of doing the job. However, nails still have the advantage of being inexpensive, easy to use, and readily available. So when it comes down to adhesives or nails, the choice is yours.